
Generate dungeons for your roguelike game with Rust
August 11, 2024
Learn how to create a roguelike in Rust using the dungeon generation algorithm Tatami.
Greetings! In this post, I'll be teaching you how to use a dungeon generation algorithm I've been writing, Tatami, to quickly and easily create dungeons for your roguelike game.
Since Tatami was written in the Rust programming language, that is the language we'll be using today. However, I plan to port the API to other languages such as Node.js and Python in the future, so stay tuned for more updates!
Tatami is a roguelike dungeon generation algorithm that creates a multi-floor dungeon layout from a series of randomly oriented, interconnected rectangles. The algorithm also populates these rooms with objects commonly found in roguelikes, such as items, enemies, traps, stairs and teleporters.
It can be used with game engines that support Rust such as Godot and Bevy.
Here is an example of what the algorithm outputs:
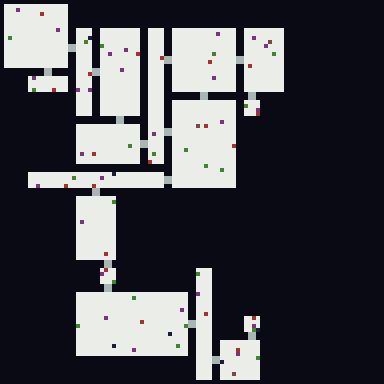
This image is color coded as follows:
- White - Floor tile
- Black - Wall tile
- Gray - Door
- Light blue - Player
- Green - Item
- Red - Enemy
- Purple - Trap
- Brown - Stairs
- Dark blue - Teleporter
Getting Started
To follow along with this tutorial, add the following to your Cargo.toml:
tatami-dungeon = "0.1.5"
I highly recommend following along with the documentation.
In Tatami, you'll mostly be working with 3 structs: Dungeon, Floor and Room. Dungeons contain floors and floors contain rooms.
Here's an example of how you can generate a dungeon and iterate over each room in it:
use tatami_dungeon::Dungeon;

let dungeon = Dungeon::generate();

for floor in &dungeon.floors {
  for room in &floor.rooms {
    println!(
      "{}: {} items, {} enemies, {} traps, {} stairs, {} teleporters",
      room.id,
      room.items.len(),
      room.enemies.len(),
      room.traps.len(),
      room.stairs.len(),
      room.teleporters.len(),
    );
  }
}
Using this code, you can print the number of objects each room contains.
Floors also contain a 2D array of tiles you can iterate over:
for floor in &dungeon.floors {
  for (x, column) in floor.tiles.iter().enumerate() {
    for (y, tile) in column.iter().enumerate() {
      match tile {
        Tile::Floor => // draw floor sprite at (x, y)
        Tile::Wall => // draw wall sprite at (x, y)
      }
    }
  }
}
Additionally, items, enemies, and traps each have position and rarity values. By default, these values range from 1-100.
Let's say you have four levels or rarity for items in your game: Common, Uncommon, Rare and Legendary. An item rarity of 1-25 could be common, 26-50 uncommon, 51-75 rare and 76-100 legendary.
You can iterate over these objects like so:
for floor in &dungeon.floors {
  for room in &floor.rooms {
    for item in &room.items {
      // pseudocode
      spawn_item(item.position.x, item.position.y, item.rarity);
    }

    for enemy in &room.enemies {
      // pseudocode
      spawn_enemy(enemy.position.x, enemy.position.y, enemy.difficulty);
    }

    for trap in &room.traps {
      // pseudocode
      spawn_trap(trap.position.x, trap.position.y, trap.difficulty);
    }
  }
}
Of course, you would replace the spawn functions with code for you own game.
Configuration
Tatami is highly configurable, with a large amount of parameters you can optionally change from their default settings.
You can find a full list of their parameters, along with their descriptions, in the GenerateDungeonParams struct.
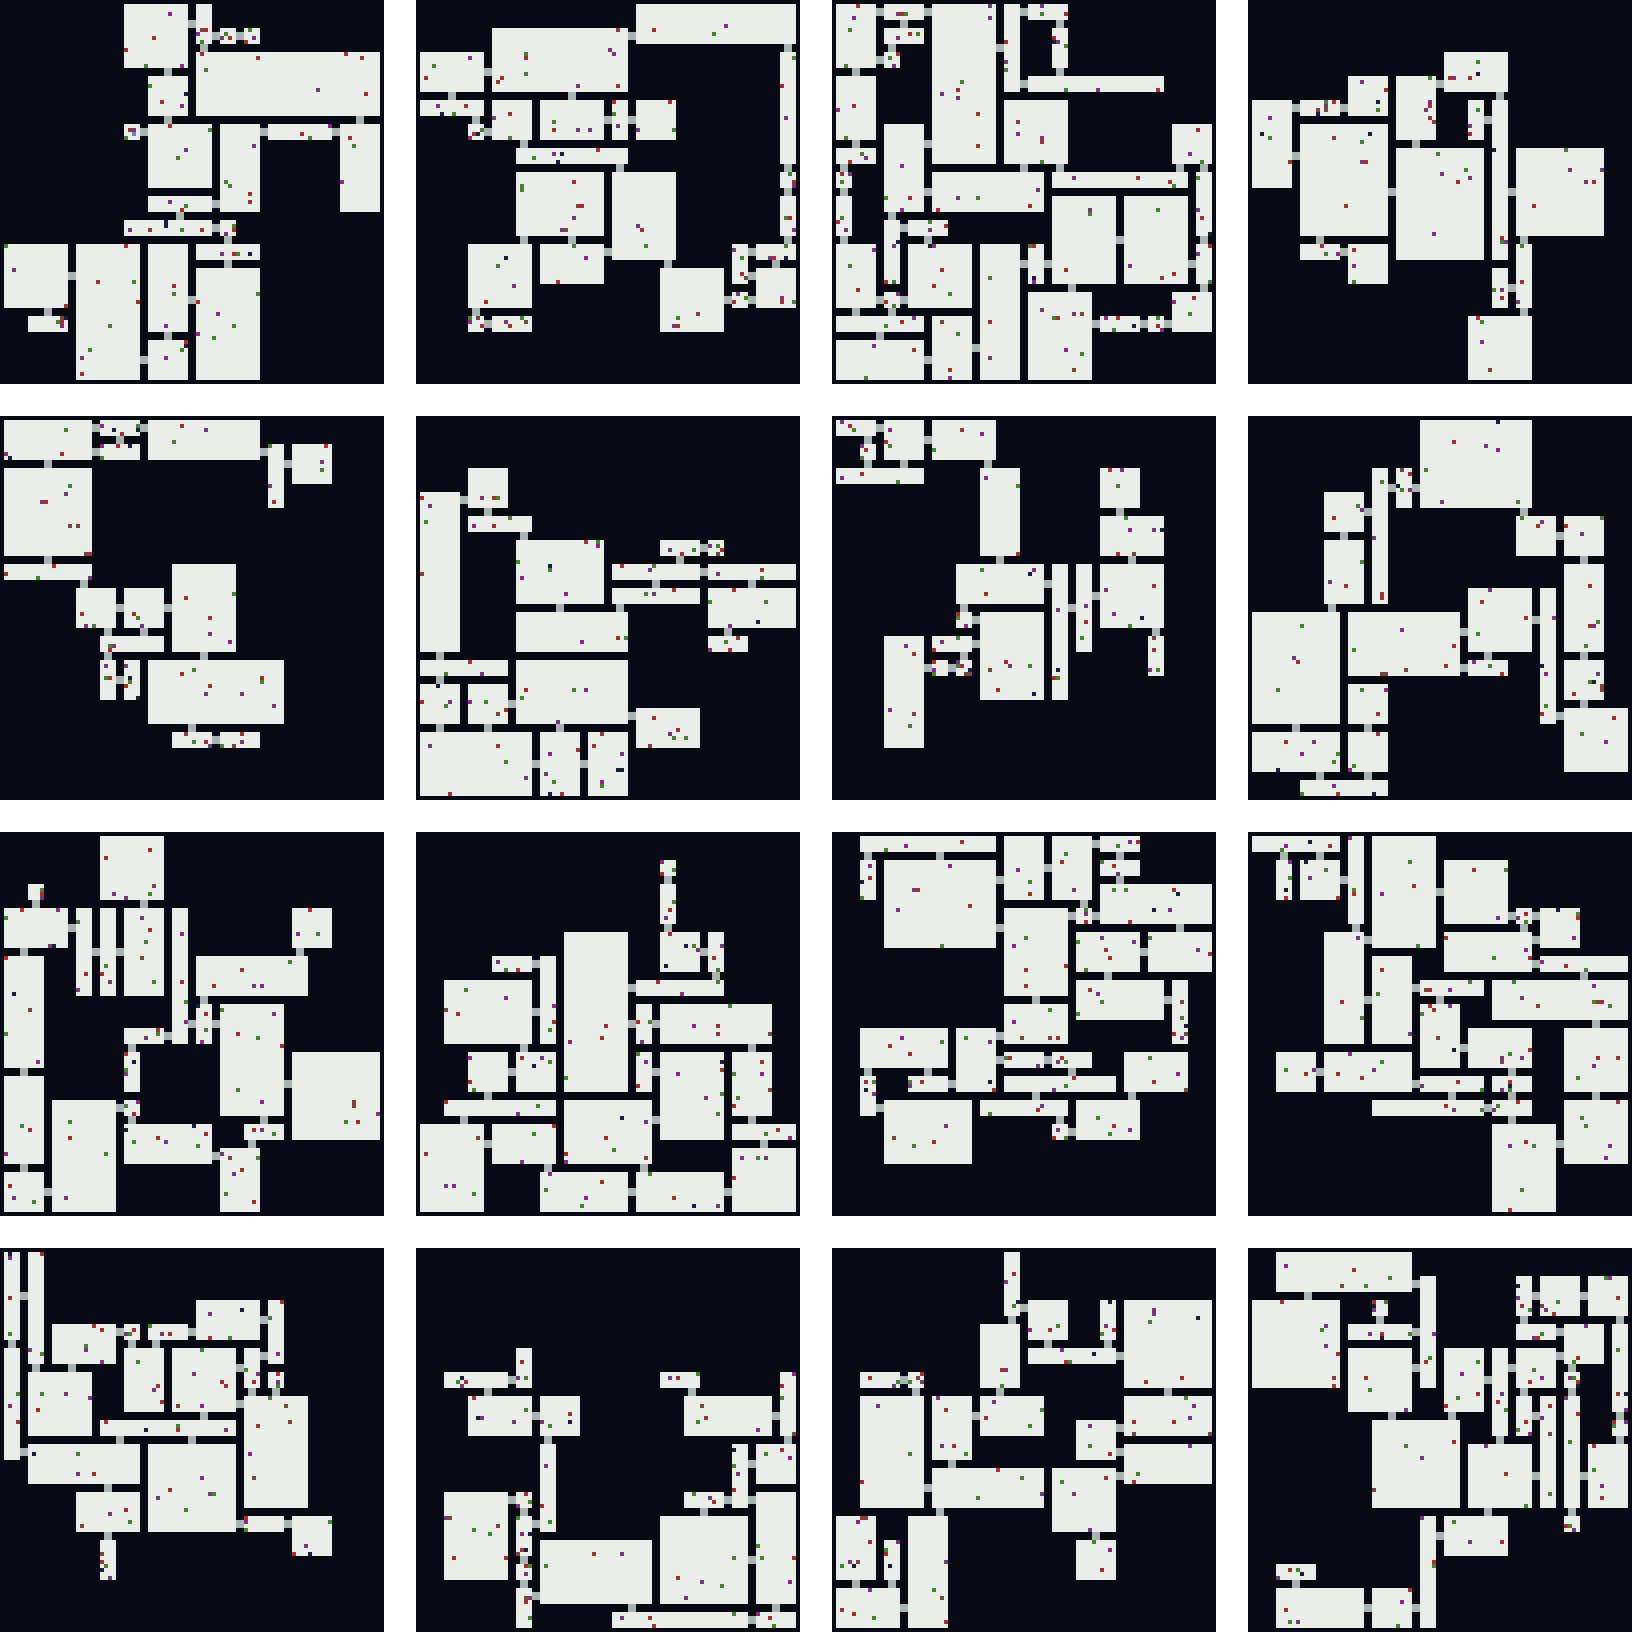
First off, you can configure the number of floors in your dungeon like so:
use tatami_dungeon::{Dungeon, GenerateDungeonParams};

let dungeon = Dungeon::generate_with_params(
  GenerateDungeonParams {
    num_floors: 16,
    ..GenerateDungeonParams::default()
  },
);
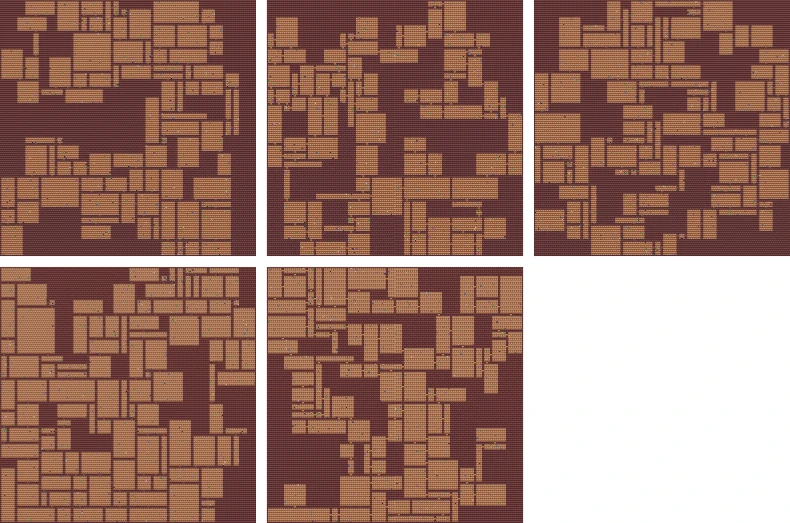
Which would create something like this dungeon:
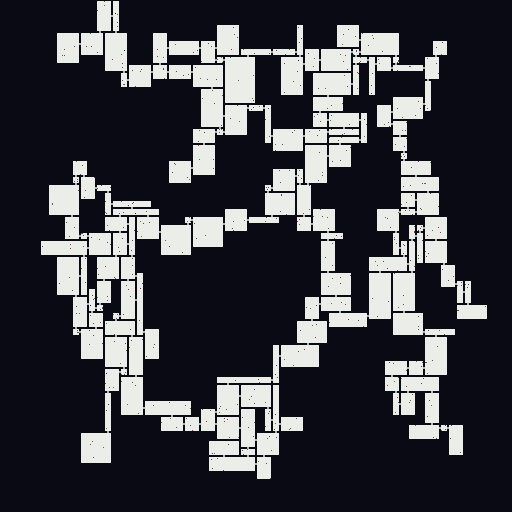
Tatami has two units of measurement for dimensions: cells and tiles. Cells are what the dungeon is generated with, which are then converted into tiles. This is what gives rooms their rectangular look.
For example, you can set the dungeon's dimensions (in terms of cells) to 64x64 as well as the tiles per cell value to 8. This will generate a dungeon that's 512x512 tiles.
use tatami_dungeon::{Dungeon, GenerateDungeonParams};

let dungeon = Dungeon::generate_with_params(
  GenerateDungeonParams {
    dimensions: (64, 64),
    tiles_per_cell: 8,
    ..GenerateDungeonParams::default()
  },
);
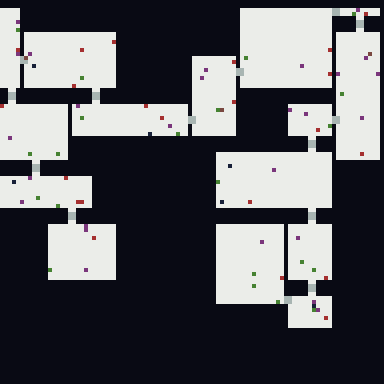
Another configurable option is wall dimensions. You can, for instance, make the height of the walls in your dungeon greater than the width.
use tatami_dungeon::{Dungeon, GenerateDungeonParams};

let dungeon = Dungeon::generate_with_params(
  GenerateDungeonParams {
    wall_dimensions: (1, 4),
    dimensions: (16, 16),
    min_rooms_per_floor: 4,
    max_rooms_per_floor: 4,
    ..GenerateDungeonParams::default()
  },
);
Tatami uses something called an "item density scale" to decide the likelihood of higher concentrations of items being generated in comparison to lower concentrations.
Say you have minimum items per room set to 0 and the maximum set to 20. Each room would have a higher chance of generating 1-5 items than it would of generating 15-20 items. The higher the density scale, the lower the likelihood of generating larger numbers.
For example, this:
use tatami_dungeon::{Dungeon, GenerateDungeonParams};

let dungeon = Dungeon::generate_with_params(
  GenerateDungeonParams {
    min_items_per_room: 0,
    max_items_per_room: 20,
    item_density_scale: 1.0,
    ..GenerateDungeonParams::default()
  },
);
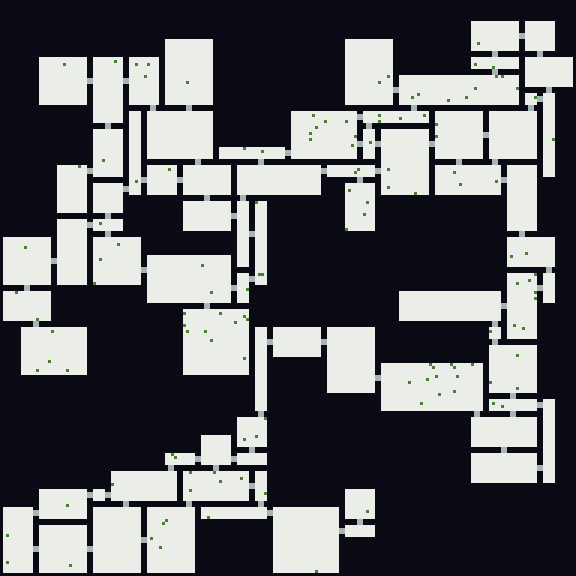
Has a higher likelihood of generating larger concentrations of items than this:
let dungeon = Dungeon::generate_with_params(
  GenerateDungeonParams {
    min_items_per_room: 0,
    max_items_per_room: 20,
    item_density_scale: 10.0,
    ..GenerateDungeonParams::default()
  },
);
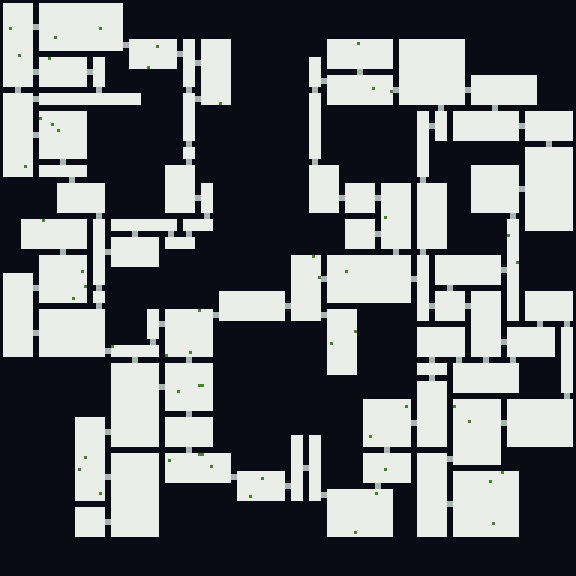
Note that in both of these cases the maximum possible number of items is the same, which means that it is still possible for 20 items to be generated in a room in the second example.
However, since the density scale is higher in the second example, it has a much lower likelihood of generating a large number of items in any given room.
Visualization
Sometimes you may want to create a visualization of the dungeons you're generating, as I have been doing this whole tutorial.
In order to output a dungeon as an image, you first need a spritesheet for each object a dungeon can contain. You can find one in the repository here.
You also need to define the resolution of the individual sprites. In the provided spritesheet, it's 8x8.
let dungeon = Dungeon::generate();
dungeon.output_as_image("output.png", "spritesheet.png", 8).unwrap();
This tiny bit of code will output an image similar to this:
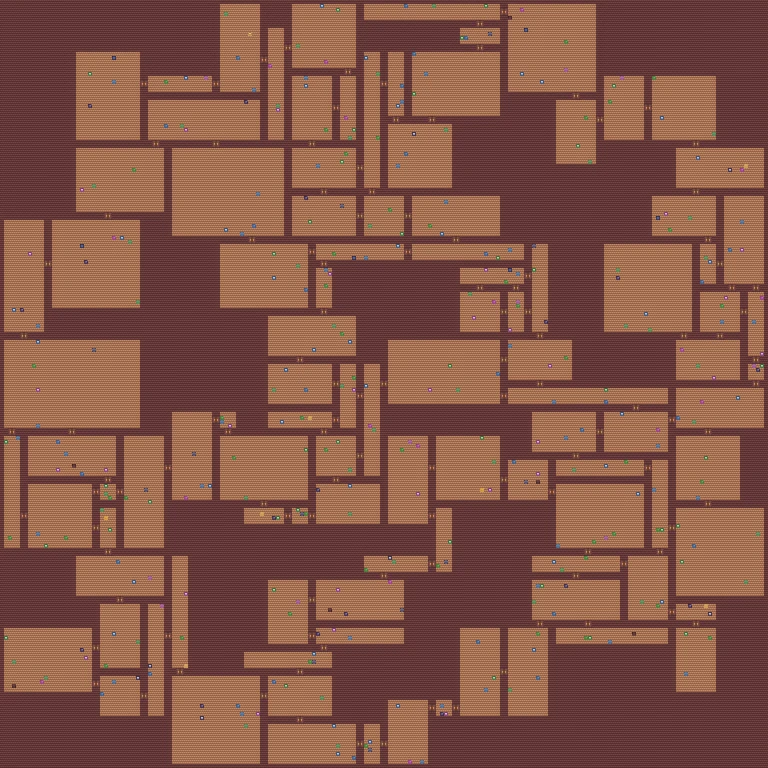
There is also the option of generating an image for a single floor.
Let's say, for example, you want to visualize the third floor. Since the array of floors is zero-indexed, you would output the floor at index 2.
let dungeon = Dungeon::generate();
dungeon.output_as_image(2, "output.png", "spritesheet.png", 8).unwrap();
Creating an image like this:
Connections
Each room is connected to a random number of its adjacent rooms.
To find which rooms are connected, you can iterate over a room's connections field, which tells you the ID of each room it is connected to, as well as the direction it is in.
For example, let's say you wanted to know which items were in rooms adjacent to the starting room.
You could use the following code:
let dungeon = Dungeon::generate();
let first_floor = &dungeon.floors[0];

// starting_room_id is the ID of the room the player starts in
let starting_room = first_floor
  .rooms
  .iter()
  .find(|room| room.id == dungeon.starting_room_id)
  .unwrap();

for room in &first_floor.rooms {
  // Check if room ID is in starting room's connections
  if starting_room
    .connections
    .iter()
    .any(|conn| conn.id == room.id)
  {
    println!("{:?}", room.items);
  }
}
You should see output similar to this:
[Item { id: 3347078872, position: Position { x: 115, y: 150 }, rarity: 13 }, Item { id: 2843928221, position: Position { x: 124, y: 153 }, rarity: 10 }]
[Item { id: 2765753102, position: Position { x: 123, y: 177 }, rarity: 46 }]
Each floor can also generate two methods of transportation that are connected in pairs: Stairs and Teleporters.
Each stairway can either be downwards or upwards. Downwards stairs connect to upwards stairs located in the next floor, while upwards stairs connect to stairs in the previous floor.
Teleporters, on the other hand, allow the player to teleport between rooms on the same floor.
Both stairs and teleporters have connected fields that can be used to find the ID of their partner.
Here's an example of how you could get the position of a connected stairway:
let dungeon = Dungeon::generate();
let floor_number = 1;
let floor = &dungeon.floors[floor_number];

// Let's just grab the first stairs we find
let stairs = floor
  .rooms
  .iter()
  .find_map(|room| {
    // Not all rooms have stairs in them
    if room.stairs.is_empty() {
      None
    } else {
      Some(room.stairs[0])
    }
  })
  .unwrap();

// If stairs are downwards, find next floor
let next_floor = if stairs.downwards {
  &dungeon.floors[floor_number + 1]
// If stairs are upwards, find previous floor
} else {
  &dungeon.floors[floor_number - 1]
};

for room in &next_floor.rooms {
  let connected_stairs = room
    .stairs
    .iter()
    .find(|other| other.id == stairs.connected);
  if let Some(connected_stairs) = connected_stairs {
    println!("{:?}", connected_stairs.position);
    break;
  }
}
The process for teleporters is very similar, with the difference that you would search the same floor rather than the next/previous.
Conclusion
That's all we'll be covering in this tutorial. There are more features, of course, so if you would like to learn more, be sure to check out the documentation.
If all went well, you now know how to:
- Generate a dungeon
- Visualize a dungeon
- Configure dungeon parameters
- Iterate over a dungeon floor's tiles
- Operate over data for items, enemies and traps
- Find the connections between rooms
- Transport the player between stairs and teleporters
If you decide to use my algorithm to create a roguelike game, tell me about it! I'd be glad to see how people make use of it.
Also, if the project interests you, please star it on GitHub and follow me on Itch.io. I expect the project to evolve with time.
And subscribe to this blog! I plan to post more tutorials on various topics in the future.
Good luck with your gamedev adventures!